Microneedling has quickly emerged as one of the most popular cosmetic procedures in the world, boasting of its capacity to stimulate collagen production and elastin production, flatten acne scars, and re-epithelialize pitted skin. But in the case of most first-time patients, the immediate aftermath can be visually frightening.
The reflection in the mirror after a microneedling session is usually a cause of anxiety: “Is this red face normal? “Did I ruin my skin?” “How long does microneedling take to heal?”When will I ever be able to go back to work without people looking at me?
Knowing the microneedling healing time and phases is not only about time management; it is time management of your mind. The recovery process is not a straight line, it is a biological process that differs greatly depending on the depth of the needle, the type of skin, and, most importantly, the quality of the device.
This step-by-step guide will take you through the healing journey day by day, distinguish between normal inflammation and infection, and show you why the technology applied during your session is the key to how quickly you recover.
The Science Behind the Microneedling Healing Process

The only way to go through the microneedling healing stages without panicking is to first of all know what is going on under your skin. Microneedling treatment, also known as Collagen Induction Therapy (CIT), is based on a principle of controlled injury to the skin cells.
As the device slides across your skin, it leaves thousands of tiny punctures (micro-injuries) in the dermis. Although this may sound threatening, these channels are strategic. They are meant to activate the skin’s natural healing process, which takes place in three phases:
- Inflammation (Days 1-3): Immediately after the skin is pierced, your immune system responds by rushing blood to the area to clean out debris and prevent infection. This is why you experience redness (erythema) and warmth. This inflammation is not a “side effect”; it is the catalyst for repair.
- Proliferation (Days 3-5): Your body begins to rebuild. Fibroblasts (cells that create connective tissue) start pumping out new collagen production and fibers. During this phase, your skin creates a temporary tissue structure, often resulting in a dry or rough skin texture as the skin turns over.
- Remodeling (Weeks 4-6+): The temporary collagen is replaced by stronger, more organized collagen type I. This is when the skin tightens, and scars begin to smooth out.
The Takeaway: Understanding this biology helps shift your mindset. The redness you see in the mirror is simply visual evidence that your skin’s natural healing is working hard to achieve skin rejuvenation. Unlike harsh chemical peels, this process preserves the epidermis.
The 7-Day Microneedling Healing Stages Timeline
While every individual heals differently, most standard treatments follow a predictable healing timeline. Here is a realistic, day-by-day breakdown of what you can expect regarding microneedling recovery.
Day 1-2: The Inflammatory Phase (The “Sunburn” Phase)
The Feeling:
Microneedling immediately after, your skin will feel tight, hot, and sensitive to the touch. The sensation is almost identical to a moderate sunburn or mild sunburn. You may feel a pulsing sensation, which is simply the increased blood flow to the treated area.
The Look:
Your face will likely be a bright pink or deep red, depending on your skin tone and the depth of the needles used. Slight swelling (edema) is common, especially around the delicate eye area.
Critical Action:
Do not wash your face for the first 12 to 24 hours. The micro-channels remain open for a short period, and tap water can introduce bacteria. Use only the sterile saline solution provided by your practitioner if absolutely necessary.
Pro Tip: Sleeping with your head elevated on two pillows during the first night can help drain excess fluid and significantly reduce swelling the next morning.
Day 3-5: The Proliferation Phase (The “Peeling” Phase)
The Feeling:
The heat and tenderness will disappear and in its place will be the feeling of extreme dryness and tightness. Your skin texture can feel like sandpaper, rough velvet, or tight parchment paper.
The Look:
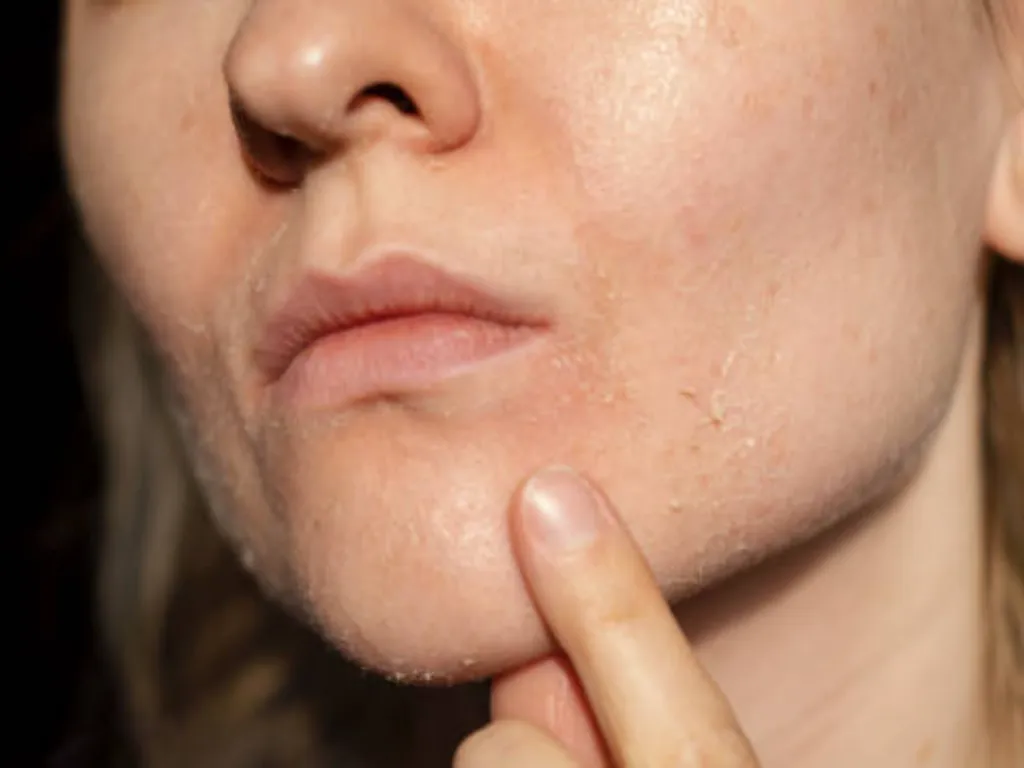
The intense redness will be diluted to a pinkish shade. This is the time that peeling after microneedling (desquamation) usually starts. It can appear as dandruff or scaly dry skin. This is the old, scaly layer of epidermis shedding off to leave the new tissue beneath.
Critical Action:
Do not pick, scratch or scrub the flakes. Peeling the skin prematurely may result in scarring or hyperpigmentation. Always keep the skin hydrated using a basic hydrating serum with Hyaluronic Acid.
Day 6-7: The Recovery Phase (The “Glow” Phase)
The Feeling:
You should no longer have the feeling of sensitive skin. The tightness is gone and the texture starts to soften considerably, restoring overall skin health.
The Look:

Most of the visible side effects are typically eliminated by day 7. As the deep healing goes on beneath, the epidermis (outer layer) has healed and renewed itself. You will find that your complexion looks like radiant skin.
The Social Survival Guide: Managing the “Ugly Phase”
Admittedly, the initial 48 hours may be socially awkward. In case you fear to go out into the world with a beet-red face, the following are some of the ways to cope with the “ugly” stage:
- Schedule Strategically: When you have a regular Monday-Friday job, then schedule your appointment on Friday late in the afternoon. This will enable the peak redness (Day 1 and 2) to be on the weekend so that you will be presentable by Monday morning.
- The “Zoom” Hack: When you need to make video calls, and you are not fully recovered yet, the light is everything. Direct overhead lighting should be avoided because it produces harsh shadows and accentuates peeling texture. Instead, sit before a window that has natural light. The light diffracted has higher chances of blowing holes on the camera and your skin is smoother.
- Physical Disguise: Face mask and a big hat are your best friends when you need to go out of the house. Not only do they cover the peeling, but they also provide a much needed physical protection against UV rays, which you must avoid at all costs.
Identifying Infection vs. Normal Inflammation
The most common fear that patients have after observing the severe redness on Day 1 is: “Is my face infected? It is important to differentiate between healthy inflammatory responses of the body and dangerous bacterial infection.
Use the table below to check your symptoms:
| Feature | Normal Healing Signs | Signs of Potential Infection |
| Color Pattern | Uniform redness (pink/red) that fades daily. | Red streaks spread outwards from the treated area. |
| Temperature | Warmth or heat for the first 24-48 hours. | Fever, chills, or skin that feels excessively hot after Day 3. |
| Fluid/Discharge | Slight pinpoint bleeding immediately after; minor clear fluid. | Yellow, green, or cloudy pus; oozing blisters. |
| Sensation | Tightness, stinging (like sunburn), mild itchiness. | Severe, throbbing pain that increases over time. |
| Texture | Dry, rough, flaky skin. | Hard lumps (granulomas) or raised boils. |
If you experience any signs in the right-hand column, contact your dermatologist or practitioner immediately.
Essential Aftercare: Skincare Do’s and Don’ts

Once you have confirmed your healing is on track, the next step is ensuring you don’t accidentally sabotage your optimal results. Your skin barrier is temporarily compromised, making it highly permeable—meaning it absorbs everything, including bad ingredients. Following proper aftercare is essential.
The “Do’s” List:
- Do use Hyaluronic Acid: This is your best friend for hydration.
- Do use a gentle, non-foaming cleanser: Start this 24 hours post-treatment.
- Do use Physical Sunscreen: Zinc oxide or Titanium dioxide formulas are less irritating than chemical ones.
The “Don’ts” List:
- Don’t use Retinol/Vitamin A: Stop for at least 5-7 days.
- Don’t use Vitamin C or Acids (AHA/BHA): The low pH will sting and cause massive inflammation.
- Don’t Sweat: Avoid gyms, saunas, and hot showers for 72 hours. Sweat contains bacteria that can enter the open micro-channels.
For a complete shopping list of safe serums and a detailed morning-to-night routine, please check out our comprehensive guide to microneedling aftercare tips.
Special Considerations for Darker Skin Tones
If you have Fitzpatrick skin type IV-VI (olive, brown, or black skin), your healing process requires extra vigilance against Post-Inflammatory Hyperpigmentation (PIH).
- The “Browning” Phenomenon: Instead of turning bright red, darker skin often turns a deep bronze or dark brown color immediately after treatment. This is a normal melanin response to trauma.
- Strict UV Avoidance: Melanin-rich skin creates pigment as a defense mechanism. If you expose your healing skin to the sun, your body may overproduce pigment, leading to dark spots. Physical shading (hats/umbrellas) is safer than sunscreen in the first 24-48 hours to avoid potential irritation from chemical SPF ingredients.
How Needle Depth Affects Your Recovery Time
One of the biggest misconceptions is that microneedling has a fixed recovery time. In reality, the needle depth used determines your microneedling downtime. A shallow cosmetic treatment differs vastly from a deep scar revision session.
| Needle Depth | Primary Goal | Estimated Downtime |
| 0.25mm – 0.5mm | Product absorption, brightness, texture | < 24 Hours (Socially ready next day) |
| 1.0mm – 1.5mm | Mild wrinkles, pigmentation, overall anti-aging | 2 – 3 Days (Expect visible peeling) |
| 2.0mm – 3.0mm | Deep acne scars, stretch marks, body treatments | 4 – 7 Days (Redness, bleeding, flaking) |
Note: Always ask your practitioner what depth they are planning to use so you can plan your social calendar accordingly.
Why Device Quality Matters for Faster Healing

Have you ever wondered why some people are cured in two days and others fight redness a week, despite having the same depth of the needle? It is not necessarily their skin, but the quality of the device.
Poor quality manual rollers or low-cost automated pens are not usually stable on the motor. This makes the needles shake or drag in the skin forming V-shaped tears (micro-tearing) instead of clean punctures. These tears result in avoidable trauma, excessive bleeding and a long healing process.
The Konmison Difference: Precision Engineering for Minimum Microneedling Downtime
At Konmison, we understand that effective treatment shouldn’t mean painful recovery. As a leading manufacturer of beauty equipment based in Guangzhou with over 12 years of experience and ISO 13485 medical quality certification, we engineer our devices to ensure the fastest possible healing.
Here is how professional-grade equipment changes the healing game:
1. Vertical Insertion Technology
Unlike standard rollers that enter at an angle, Konmison’s automated microneedling devices utilize high-precision motors to drive needles vertically in and out of the skin. This perpendicular entry ensures clean, precise channels without tearing the epidermis.
- The Result: Significantly less pain during the procedure and a drastically shorter microneedling downtime.
2. Biocompatible Materials (303 Stainless Steel)
Safety starts with materials. We utilize 303 food-grade stainless steel for our internal structures and needles. This high-quality material is rust-resistant, hypoallergenic, and durable. It prevents the risk of metal-induced allergic reactions or inflammation that can occur with cheaper nickel-based needles found in the market.
3. The Gold RF Advantage: Coagulation & PRP Compatibility
For those seeking powerful results with minimal bleeding, our Gold RF Microneedling Machine is the gold standard.
- Coagulation Effect: Radio Frequency (RF) energy released at the tip of the needle forms a coagulation effect. This assists in preventing bleeding immediately when the needle enters the body, which results in a much cleaner process and quicker initial healing than the conventional mechanical microneedling.
- The Perfect Partner for PRP: In case you are planning to use PRP (Platelet-Rich Plasma) therapy, this is the best delivery system. The accuracy of the gold-plated needles makes open and clean micro-channels to maximize the absorption rate of costly PRP serums, so you can get the full benefit of the growth factors.
By choosing a practitioner who uses high-quality equipment like Konmison’s, you are investing in a safer, faster, and more comfortable recovery journey.
Real Results: When to Expect Visible Improvements
Finally, managing your expectations is vital. You have survived the red face and the peeling, but when will you actually look younger?
It is important to distinguish between surface healing and collagen remodeling.
- Week 1 (Surface Healing): Your skin looks smooth, bright, and “healed” to the naked eye. But the more fundamental structural changes are yet to occur.
- Week 4-6 (Collagen Regeneration): It is the magic window. It takes approximately a month to undergo neocollagenesis (new collagen formation). It is at this point that you will begin to notice the tightening of the pores, the filling of acne scars and the softening of fine lines.
The Cumulative Effect
Microneedling is rarely a “one-and-done” treatment. Deep scars or stretch marks often require a series of 3 to 6 sessions. The results stack on top of each other.
To visualize this timeline and see the difference between one session and a full course, check out our detailed gallery of microneedling before and after results. Seeing the long-term transformation can help you stay patient during the waiting game.
Conclusion
The microneedling healing stages, starting with the first sunburn to the peeling and eventually the glow are all indications that the treatment is effective. With this knowledge of the timeline, adherence to aftercare, and making sure that your treatment is done using high-precision equipment such as that of Konmison, you can sail through your recovery with ease.
Do you own a salon and want to upgrade your services? Today, explore the variety of ISO-certified beauty machines that Konmison offers to provide your clients with the best results with minimum microneedling downtime.