
Buying a cavitation machine for home use is an exciting step toward achieving your body contouring goals, but unboxing the device is only the beginning. The internet is flooded with conflicting advice, vague instructions, and dangerous misconceptions that can lead to zero results or, worse, severe skin burns. If you are wondering why your machine makes a ringing sound in your ears, or how much conductive gel you actually need, you are in the right place. This complete guide will cut through the noise, explaining the exact science, the non-negotiable safety rules, and the realistic timeline for seeing true fat-reduction results.

01What Is a Cavitation Machine and How Does It Work?
A cavitation machine uses low-frequency ultrasonic waves — typically around 40kHz — to target stubborn fat deposits beneath your skin. The sound waves penetrate to the subcutaneous fat layer (about 8–15mm deep) and create microscopic bubbles within the fluid surrounding your fat cells. When these bubbles collapse, they generate tiny shock waves that temporarily disrupt fat cell membranes, causing triglycerides and fatty acids to leak out into the interstitial fluid.
From there, your lymphatic system collects the released fat and transports it to your liver, where it’s metabolized and eventually excreted. This is the same biological cleanup pathway your body uses every day — the treatment simply accelerates the process in targeted areas.
The Golden Rule of Fat Types: Cavitation has a strict physiological boundary. It only works on subcutaneous fat (the soft, jiggly fat you can easily pinch with your fingers). It is entirely ineffective on visceral fat (the hard, deep fat that surrounds your internal organs, often presenting as a firm “beer belly”). If you cannot pinch the fat, cavitation cannot treat it.
02Safety First: Who Should Not Use a Cavitation Machine at Home
At-home cavitation is generally safe when used correctly, but it’s not for everyone. The ultrasound energy genuinely changes what’s happening inside your body — and that means certain medical conditions make treatment risky rather than beneficial.
Do not use a cavitation machine if any of the following apply to you:
| Contraindication | Why It Matters |
|---|---|
| Pregnancy or breastfeeding | Ultrasound effects on fetal development and breast milk are unstudied; not worth the risk |
| Pacemaker or metal implants in the treatment area | Ultrasound can interfere with pacemaker electronics and cause heating around metal |
| Liver or kidney disease | Your liver and kidneys process the released fat — compromised organs can’t handle the extra metabolic load |
| Heart disease or uncontrolled hypertension | Circulatory system stress from fat mobilization can exacerbate these conditions |
| Active cancer or history of malignant tumors | Ultrasound may stimulate blood flow to undetected malignant tissue |
| Diabetes with complications | Impaired circulation and healing capacity increase risk of tissue damage |
| Epilepsy | Ultrasound stimulation has a theoretical seizure trigger risk |
| Open wounds, skin infections, or active acne | Ultrasound can drive bacteria deeper into tissue and worsen infection |
Areas to ALWAYS avoid with 40K Cavitation: The face, neck, thyroid gland, directly over the spine, the heart area, and the pregnant abdomen. 40K Cavitation is strictly for body use. Applying 40K ultrasound to the head or face poses severe safety risks to facial nerves and hearing.
03Before You Start: What You Need for Your First Session
You don’t need a professional setup, but five things are non-negotiable:
- Ultrasound conductive gel — This is not optional. Water, lotion, or oil cannot substitute. A standard 250ml bottle of gel used for regular, full-body sessions will typically last about 2 to 4 weeks. We highly recommend buying larger pump bottles (1000ml) or multi-packs in advance so you never have to skimp on application.
- A clean, dry towel — For wiping off gel after your session.
- Alcohol wipes or 75% isopropyl alcohol solution — To disinfect the treatment probe after each use. Bacteria thrive in residual gel.
- A large glass of water (300–500ml) — Drink it before you start. Hydrated tissue conducts ultrasound better, and your lymphatic system needs fluid.
- Your machine, inspected and calibrated — Check that the probe is clean. More importantly, ensure your device comes from a manufacturer that conducts full-unit aging tests and exact frequency calibration. Why? Non-standardized machines can emit unstable wave frequencies (clutter) that cause deep tissue thermal damage instead of safe fat cavitation. Manufacturers like Konmison (holding ISO 13485, CE, and FDA clearances) calibrate every device before shipping. A high-quality device is your first line of defense against burns.
04How to Use a Cavitation Machine: Step-by-Step Guide
Step 1: Cleanse and Apply Conductive Gel Generously
Wash the treatment area and pat thoroughly dry. Squeeze out enough gel to cover the entire treatment area in a layer roughly 2–3mm thick. Do not skimp. Insufficient gel causes an impedance mismatch — the ultrasound waves bounce back at the skin surface, risking hot spots and delivering zero energy to the fat.
Step 2: Know Your Probes (40K vs. RF)
Most home machines come with different handles. Do not mix them up.
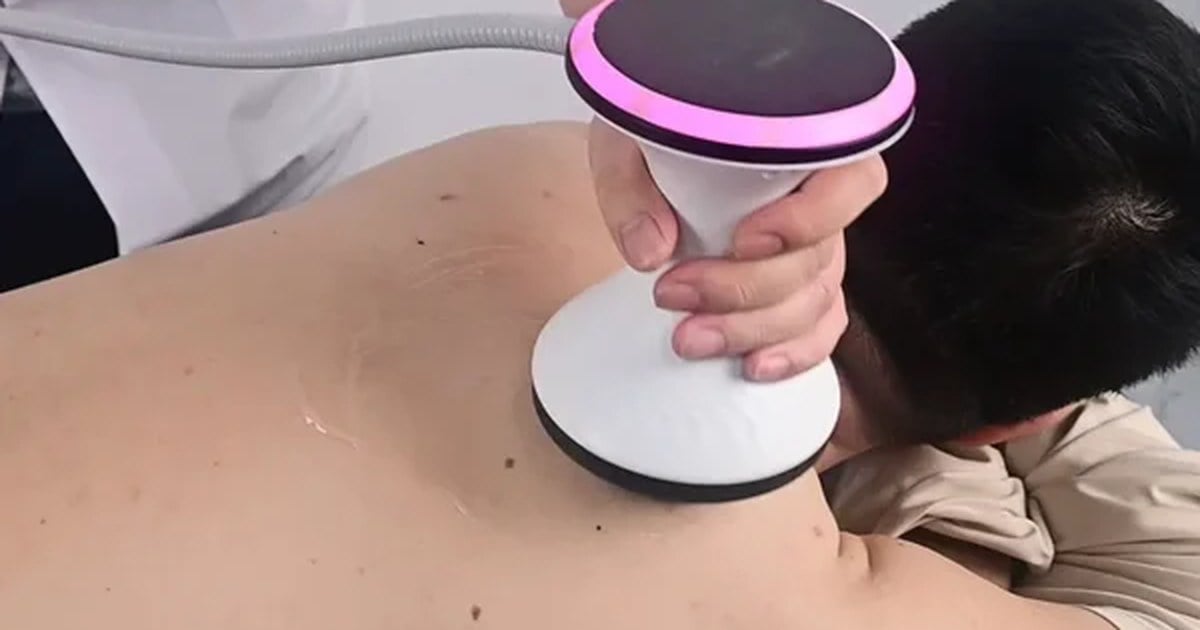
- 40K Cavitation Probe: Flat metal head. Pure mechanical sound waves. Used only on the body for fat reduction.
- RF (Radio Frequency) Probe: Prongs/poles. Uses thermal energy to heat the dermis. Used for skin tightening on the face or body.
Step 3: The “Water Drop Test” (Verifying 40K Output)
Because pure 40K Cavitation is mechanical, it does not produce heat on its own. To verify your machine is actually working before touching your skin, perform the industry-standard Water Drop Test: Place a few drops of water on the flat metal surface of the 40K probe and turn it on. You should instantly see the water drops dance and atomize into a fine mist. This proves the ultrasound waves are active.

Step 4: The 40K Sensation — The “Tinnitus” Warning
When you apply the 40K probe to your body, you will hear a high-pitched ringing or chirping sound inside your head, similar to crickets or tinnitus. Do not panic! This is completely normal. The 40kHz sound waves are traveling through your bodily fluids and bones directly to your inner ear. The person sitting next to you won’t hear it, but you will. This bone-conduction ringing is the ultimate proof that you are receiving a true ultrasound cavitation treatment.
Crucial Rule: If you are using the 40K Cavitation probe, you should not feel intense heat. If you feel burning, you are moving too slowly, lacking gel, or using a poorly calibrated machine.
Step 5: Master the Movement Technique
Keep the probe moving constantly. Slow, deliberate circular motions — roughly 2–3cm per second. Never let the probe sit stationary on one spot. Use light pressure. Rest the probe against your skin; don’t press down hard, or you compress the fat layer and hinder the bubble formation. Follow lymphatic flow. Move the probe toward your heart (e.g., sweep upward from knee toward hip) to show the released fat which way to drain.
- WATER DROP TEST — Confirm atomization before starting.
- EXPECT EAR RINGING — The tinnitus sound means the 40K wave is penetrating.
- KEEP MOVING TOWARD THE HEART — Slow circles, light pressure, follow lymph flow.
05The Parameter Matrix: Time, Intensity, and Frequency
One non-negotiable rule: space your cavitation sessions at least 72 hours (3 full days) apart. Your lymphatic system and liver need this exact window to clear the metabolized fat. Treating the same area sooner creates a metabolic traffic jam, leading to water retention and fatigue rather than faster results.
Use the matrix below to set the appropriate parameters for your home device. Note: “Typical Intensity” assumes a standard 1–10 level home machine. Always perform a patch test at a lower setting first to gauge your skin’s sensitivity.
| Body Area | Probe Required | Typical Intensity (1-10) | Duration per Session | Max Frequency |
|---|---|---|---|---|
| Abdomen / Belly | 40K Cavitation | Level 7–10 | 15–20 minutes | Every 72 hours |
| Thighs / Glutes | 40K Cavitation | Level 6–9 | 15 minutes per side | Every 72 hours |
| Love Handles / Flanks | 40K Cavitation | Level 6–8 | 10–15 minutes per side | Every 72 hours |
| Arms (Biceps/Triceps) | 40K Cavitation | Level 3–5 | 5–10 minutes per side | Every 72 hours |
| Face & Neck | RF Probe ONLY | Level 2–4 | 5–10 minutes | 1–2 times a week |
Per-session limit: Treat a maximum of two body areas per session, with total 40K treatment time capped at 30–40 minutes. Exceeding this overwhelms your liver’s processing capacity.
06Aftercare Essentials: Dos and Don’ts After Each Session
The 48 hours after your session determine whether this treatment counts or goes to waste. The fat you released is now in transit — whether it gets burned or re-stored depends almost entirely on what you do next.
| Do This | Avoid This | The Science Behind It |
|---|---|---|
| Drink 2–3 liters of water daily | Alcohol (at least 48 hours) | Water transports lymph; alcohol competes for the liver enzyme pathway (CYP450) that metabolizes fatty acids, stalling fat clearance |
| Light cardio within 4–6 hours | Fried or fatty foods | Muscular contraction pumps the lymphatic system; dietary fat adds to the metabolic backlog your liver is already processing |
| Gentle self-massage | Sugary drinks and soda | Massage supports flow toward lymph nodes; sugar spikes insulin, signaling your body to store fat immediately |
07What Results to Expect: A Realistic Timeline
Home cavitation produces gradual, cumulative results. The four variables that dictate your outcome are: consistency (most important), correct target tissue (subcutaneous fat), device quality, and post-session lymphatic support.
Weeks 1–2: The “Nothing Is Happening” Phase
You probably won’t see any visual change in the first two weeks. The fat cells you disrupted are currently navigating your lymphatic system and liver. What you might notice is the treated area feeling slightly less puffy due to fluid redistribution. Stay consistent.
Weeks 3–6: First Visible Changes
This is when consistent users start seeing cumulative circumference reduction of 1–2cm. Clothes fit differently, and skin texture appears smoother as the size of the underlying fat cells decreases.
Week 6 and Beyond: Breaking the Plateau
Around weeks 8–10, results may slow down as smaller fat cells present a smaller target for the ultrasound energy. To break through: increase your intensity slightly, incorporate the RF probe to stimulate skin tightening, or take a deliberate 2-week break to let your body reset.
References
- Bani D, Li AQ, Freschi G, Russo GL. “Histological and Ultrastructural Effects of Ultrasound-induced Cavitation on Human Skin Adipose Tissue.” Plastic and Reconstructive Surgery – Global Open. 2013;1(6):e41. https://journals.lww.com/prsgo/Fulltext/2013/09000/Article.7.aspx
- Konmison. “Quality Assurance & Certifications.” https://www.konmison.com/quality/
- Konmison — Custom Beauty Machine Manufacturer. https://www.konmison.com/


 EN
EN  RU
RU  ES
ES  IT
IT  AR
AR  FR
FR  DE
DE  JA
JA  KO
KO  NL
NL