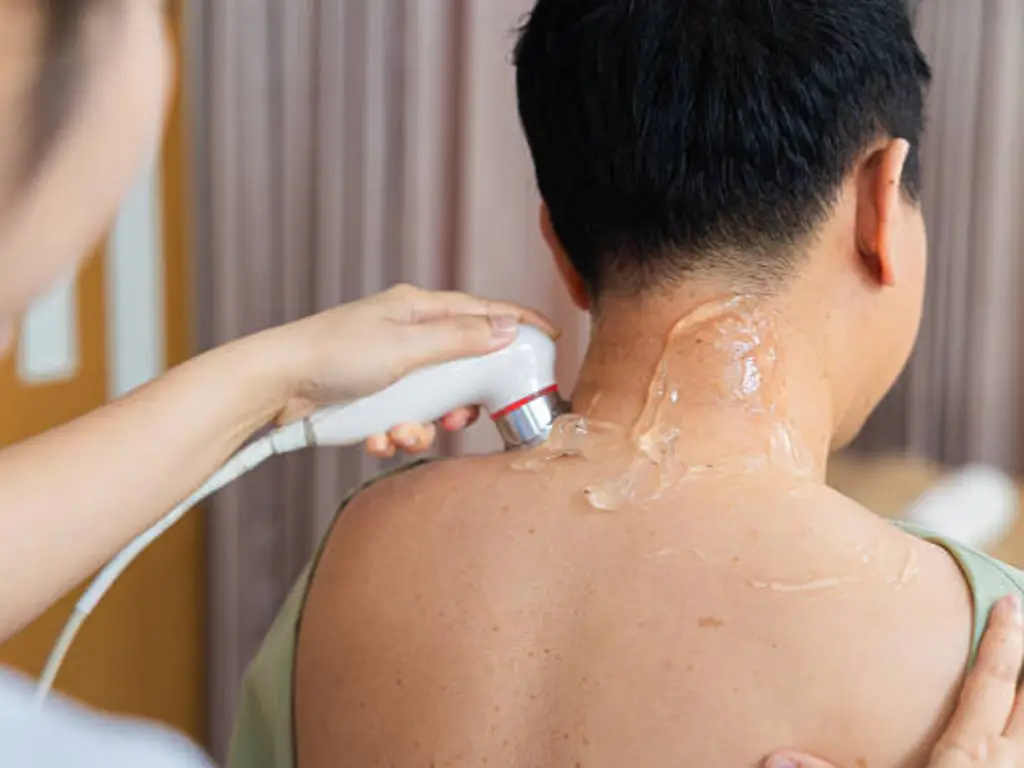
01. What Is Ultrasonic Cavitation and How Does It Work?
Imagine directing sound waves through your skin — not to create heat, but to physically shake fat cells until they break open. That’s ultrasonic cavitation in essence.
The technology uses low-frequency ultrasound, typically in the 30–40 kHz range, to generate microscopic bubbles within the fluid surrounding your fat cells. These bubbles form and collapse in rapid cycles, creating mechanical pressure that disrupts fat cell membranes through a process called acoustic cavitation. The disrupted cells release their contents: triglycerides, which your body’s enzymes break down into glycerol and free fatty acids. From there, your lymphatic system transports these byproducts to your liver for processing, and they eventually exit your body through urine.
This is not a thermal procedure. Cavitation does not “melt” or “burn” fat. It mechanically ruptures fat cell membranes using sound pressure, typically 1–3 W/cm² in clinical-grade systems. The distinction matters, because the entire treatment protocol (how often, how long, and how many sessions) is built on this mechanical-clearance biology.
02. How Often Can You Do Cavitation? The Core Protocol
The short, evidence-backed answer: 1 to 2 sessions per week, with a minimum 72 hours between treatments on the same body area.
That’s the gold standard across professional clinics, clinical research protocols, and manufacturer guidelines. But the full answer has layers, because frequency depends on where you’re being treated, what kind of machine is being used, and whether you’re treating the same area or rotating between zones.

Professional Clinic Protocol: 1–2 Sessions Per Week
In a professional setting using clinical-grade equipment, the standard protocol is one to two sessions per week, each lasting 20 to 40 minutes per treatment area, with at least 72 hours between sessions on the same body area. Here’s why these numbers exist:
The 72-hour minimum is not arbitrary. After a cavitation session, your body needs roughly 48 to 72 hours to clear the released lipids through the lymphatic system and hepatic metabolism. Treating the same area before this clearance is complete doesn’t accelerate fat loss. It creates lymphatic congestion instead, leading to swelling, tenderness, and reduced treatment effectiveness.
Different body areas can be treated in the same session without violating the rule. You can treat your abdomen and thighs in one 60-minute appointment, then return 72 hours later to treat both again, because each area gets its own 72-hour recovery window.
| Source | Recommended Frequency | Minimum Gap |
|---|---|---|
| Clinical protocols (PZLASER, 2025) | 1–2 sessions/week | 72 hours |
| Published RCTs (CoLaz review, 2020–2023) | 2 sessions/week | 48–72 hours |
| WebMD medical guidelines | 1 session/2 weeks | 14 days (conservative) |
The variation in the table is real: different sources cite different intervals. WebMD’s conservative 2-week gap reflects a medical-consensus approach that prioritizes safety above speed. Most aesthetic clinics operate closer to the PZLASER and clinical-trial model of 1–2 weekly sessions.
At-Home Devices: How the Frequency Rules Change
At-home cavitation devices operate at lower power densities, typically 0.5 to 1.5 W/cm² compared to the 1–3 W/cm² of professional machines. Because they release less fat per session, the lymphatic burden is lighter, and the rules relax slightly: home users can treat an area 1 to 3 times per week, with at least 48 hours between sessions, for 10 to 15 minutes per area.
But there’s a tradeoff. The lower power also means shallower penetration. Most home devices use 40 kHz transducers that effectively treat superficial fat (1–2 cm depth) but cannot reach deeper subcutaneous layers (3–5 cm). If you’re treating stubborn abdominal fat with a home device, you may need more total sessions to see comparable results, and some deep fat pockets may not respond at all.
Factors That Can Change Your Ideal Frequency
Not everyone should follow the same cadence. Four factors can shift your optimal frequency up or down:
Fat thickness. Thicker subcutaneous fat (above 3 cm) tolerates more frequent treatment (up to twice weekly) because the metabolic load is distributed across a larger fat volume. Thinner fat (under 1.5 cm) responds better to once-weekly sessions; treating it more often risks disproportionate swelling relative to the fat loss.
Treatment area sensitivity. The abdomen and thighs are relatively robust and can handle the standard 1–2 weekly sessions. The face and chin, where the fat layer is only 0.5 to 1.5 cm thick, require gentler spacing: once per week, 3 to 6 total sessions, with shorter per-session duration (around 20 minutes).
Combination treatments. If your session pairs cavitation with radiofrequency (RF) for skin tightening (a common and effective combination), your body has a dual metabolic load to process. The recommended interval extends to 5–7 days between sessions, because RF adds thermal tissue stimulation on top of the cavitation lipid release.
Individual metabolism. People who are younger, more active, and well-hydrated clear the released lipids faster. If you exercise regularly and drink sufficient water daily, you may tolerate the faster end of the frequency range (twice weekly). If you’re sedentary or tend toward water retention, stick with once a week.
03. Why 72 Hours? The Biology Behind the Gap
Most articles tell you “wait 72 hours” and stop there. But understanding what actually happens inside your body during those three days makes the rule impossible to ignore. It also explains why people who rush the process tend to swell, not slim.
Here’s the timeline of a single cavitation session, hour by hour:
0–2 hours post-treatment. Ultrasound pressure waves have disrupted adipocyte (fat cell) membranes. Triglycerides spill into the interstitial fluid, the space between your cells. The treated area may feel warm or look slightly pink. This is the “release phase.” Nothing has left your body yet.
2–24 hours post-treatment. Your lymphatic system (a network of vessels that runs parallel to your blood circulation) begins collecting the released lipids. Lymphatic fluid moves passively, driven by muscle contractions and breathing, at a resting flow rate of roughly 2–3 liters per 24 hours. Your liver starts receiving the first wave of free fatty acids and begins processing them through beta-oxidation. This is why light movement after treatment matters: skeletal muscle contractions physically squeeze lymphatic vessels, doubling or tripling the clearance rate.
24–48 hours post-treatment. The bulk of the released triglycerides has been transported. Your liver is at peak metabolic load, converting fatty acids into usable energy or preparing them for excretion. The interstitial fluid around your treated fat cells begins to clear. If you’re well-hydrated (2–3 liters of water daily), this phase moves efficiently. If you’re dehydrated, clearance slows, and the lingering interstitial fluid causes the puffy look some people report 2–3 days post-treatment.
48–72 hours post-treatment. Residual metabolic byproducts finish clearing. Fat cell membranes stabilize and repair. Adipocytes don’t die in cavitation; they partially empty. The treated area returns to its baseline state, now slightly leaner.
What happens if you treat again too early, say at 24 or 48 hours? You superimpose a new wave of lipid release onto an already-burdened lymphatic system. Fluid accumulates in the treated area. Clinically, this presents as swelling that masks any fat reduction. You look temporarily puffier, not leaner. Over multiple rushed sessions, the chronic lymphatic overload can lead to persistent tenderness and diminishing returns. The protocol exists because the biology demands it.
04. Your Session Schedule: Body Area, Timeline, and What Results to Expect
A complete cavitation course typically spans 6 to 12 sessions over 6 to 12 weeks, with final results settling fully 6 to 12 weeks after your last treatment. That “6–12–12” framework is the memory anchor: 6–12 sessions, over 6–12 weeks, fully visible at 6–12 weeks post-course.
Session Count by Body Area
| Treatment Area | Total Sessions | Per-Session Duration | Weekly Frequency | Total Weeks | Notes |
|---|---|---|---|---|---|
| Abdomen / Stomach | 6–12 | 20–40 min | 1–2 | 6–12 | Largest treatment surface; deeper fat may need more sessions |
| Thighs / Buttocks | 6–10 | 20–40 min | 1–2 | 6–10 | Inner and outer thighs respond differently |
| Arms (upper) | 4–8 | 20 min | 1–2 | 4–8 | Smaller fat volume; results visible earlier |
| Chin / Face | 3–6 | 20 min | 1 | 3–6 | Thinnest fat layer; gentlest protocol required |
| Flanks / Love Handles | 6–10 | 20–40 min | 1–2 | 6–10 | Stubborn fat; often combined with abdomen treatment |
The abdomen requires the most sessions not because it’s harder to treat, but because it simply has more fat to process. Each centimeter of subcutaneous fat thickness roughly translates to an additional 1–2 sessions needed for visible contouring. The face requires the fewest sessions for the inverse reason: there’s far less total fat to mobilize.
What to Expect at Each Stage of Your Course
Sessions 1–2: The Baseline Phase. Do not expect visible changes. Your body is just beginning the lipid clearance process. Some people feel slightly less bloated or notice their skin feels tighter. This is primarily the initial fluid shift, not fat loss. Mild swelling or tenderness in the treated area is normal and typically resolves within 24–48 hours.
Sessions 3–4: The First Measurable Change. This is where the tape measure starts to move. Most people see a 1–2 cm reduction in abdominal circumference. Clothes fit slightly differently: a waistband that was snug becomes comfortable. Published clinical data supports this timeline. A 2023 analysis of cavitation treatment outcomes reported an average 2–4 cm abdominal circumference reduction across a full 8-session course, with the first measurable changes clustering around sessions 3–4.
Sessions 5–7: The Meaningful Drop. The treated area visibly changes. For abdomen, circumference reduction reaches 2–4 cm. A 2020 randomized controlled trial using 10 sessions (20 minutes each, twice weekly) demonstrated statistically significant subcutaneous fat thickness reduction compared to a control group. The body has now processed several waves of lipid release, and the cumulative effect becomes visually apparent.
Sessions 8–12: Consolidation. These sessions target remaining uneven fat pockets and reinforce the contour. Not every area responds uniformly. One side of the abdomen may lean out faster than the other. The consolidation phase evens out these asymmetries.
6–12 Weeks Post-Course: Final Settlement. The full effect of your course continues to develop for up to three months after your last session. The body keeps clearing residual lipids and remodeling the treated tissue during this period. Maintenance sessions, typically once every 4 to 8 weeks, help sustain the result.
How to Maximize Results Between Sessions

The time between sessions is not downtime. It’s when the actual fat loss happens. Five evidence-backed actions make a measurable difference:
Drink 2–3 liters of water daily. Lymphatic fluid is over 90% water. If you’re under-hydrated, your body’s lipid transport system moves at a crawl. One liter before treatment and consistent intake throughout the day keeps clearance efficient.
Move for 20 minutes after each session. A brisk walk is enough. Skeletal muscle contractions physically compress lymphatic vessels, accelerating flow rate from a resting ~2–3 liters per day to 5–10 liters per day during exercise. You’re not sweating out fat. You’re pumping your internal clearance system.
Limit alcohol during your treatment course. Your liver processes both alcohol and the free fatty acids released by cavitation. When both arrive simultaneously, alcohol takes metabolic priority, and fat clearance slows. Moderate consumption won’t ruin your results, but heavy drinking during a treatment week directly undermines them.
Don’t use the scale as your progress metric. Cavitation is body contouring, not weight loss. The fat cells partially empty; they don’t disappear. Your weight may stay the same while your circumference shrinks. Track progress with a measuring tape and before/after photos, not a bathroom scale.
Prioritize sleep. The lymphatic system, including the brain’s glymphatic system, is most active during deep sleep. Peripheral lymphatic clearance follows a circadian rhythm, with peak activity in the late-night window (roughly 10 PM to 2 AM). Consistent sleep deprivation slows the very system your results depend on.
Hydration
2–3 L water/day, 1 L before treatment. Keeps lipid transport moving at peak efficiency.
Movement
20-min walk post-session. Skeletal muscle contractions boost lymphatic flow 2–3×.
Recovery
7–8 h sleep. Peak lymphatic activity occurs during the late-night window (10 PM–2 AM).
05. Does the Machine Matter? How Equipment Quality Shapes Your Treatment Protocol
Here’s a question most cavitation guides never ask: if you’re following the protocol perfectly (72-hour spacing, proper hydration, consistent sessions) but using unreliable equipment, are you actually getting the treatment you think you are?
The answer is no. Treatment frequency is not an independent variable. It depends on the machine delivering predictable, stable energy output session after session. A protocol designed for clinical-grade equipment at 1–3 W/cm² produces fundamentally different results when run through a machine with unstable power delivery or a transducer that overheats and throttles output halfway through a session.
Machine Specs That Directly Affect Your Treatment Frequency
Frequency stability. Crystal transducer frequency should drift less than ±5% from its rated output. A machine rated at 40 kHz that drifts to 36 kHz mid-session is delivering less cavitation effect than expected, and you won’t feel the difference. The treatment happened on your schedule, but the effective dose was lower than planned.
Transducer power density. Clinical-grade cavitation requires 1–3 W/cm² of acoustic pressure at the treatment surface. Power density is calculated as acoustic output power (in watts) divided by the effective radiating area of the transducer (in cm²). A transducer with a large face area but low total power output may appear to cover more skin while delivering sub-clinical energy density: enough to warm the tissue, not enough to disrupt fat cells reliably.
Acoustic field uniformity. A well-designed transducer produces a consistent energy field across its entire radiating surface. Poorly manufactured transducers create “hot spots” (localized zones of higher energy that can cause discomfort or skin irritation) alongside “cold zones” where cavitation simply isn’t occurring. You can’t see this unevenness, but it means parts of the treated area get effective treatment while adjacent parts get almost none.
Cooling system effectiveness. Continuous cavitation generates heat in the transducer head. A machine with effective cooling maintains stable output for the full 20–40 minute session. One without it will begin power-throttling as the transducer temperature rises, typically after 10–15 minutes of continuous use. The first half of the session works; the second half delivers progressively less energy. Transducer surface temperature should remain at or below 40°C; above 42°C, skin burn risk increases.
Quality assurance infrastructure. This is the parameter that wraps all the others. Machines built in facilities with ISO 13485 medical device quality management typically undergo PCB board aging tests (48+ hours of continuous operation), 100% incoming component inspection, and full-unit burn-in testing before shipping. Machines built without this infrastructure may pass a basic power-on test but drift, overheat, or fail after weeks of clinical use, exactly when your clients are midway through their treatment course and expecting results.
| Parameter | Professional-Grade | Entry-Level |
|---|---|---|
| Frequency stability | < ±5% drift | May drift 10–20% under load |
| Transducer lifespan | 5,000+ operating hours | 1,000–2,000 hours before efficiency drop |
| Power decay at 30 min continuous use | < 10% reduction | 30%+ reduction |
| Cooling system | Maintains ≤ 40°C transducer temp | Overheats, throttles output |
| Quality certifications | ISO 13485 + CE + FDA | Often CE only, self-declared |
Professional-Grade vs. Entry-Level: What the Protocol Tells You About the Machine
There’s a useful mental model here: reverse-engineer the protocol to evaluate the equipment. If a machine claims to support “twice-weekly abdominal cavitation, 30 minutes per session,” ask whether it can actually deliver stable 1–3 W/cm² output for 30 continuous minutes, twice a week, for 12 weeks straight, without power decay, without overheating, without transducer degradation.
That question separates machines built for clinical workloads from those built for occasional use.
When evaluating equipment manufacturers, look beyond the spec sheet. A manufacturer operating a 12,000-square-meter factory with six automated production lines, conducting 48-hour PCB aging tests on every unit, and holding a full international compliance stack (ISO 13485 for medical device quality management, plus CE, FDA, RoHS, FCC, and MSDS) provides a fundamentally different quality baseline than one assembling from commodity components with self-declared CE marking. These certifications aren’t marketing badges; they represent independently audited quality systems that directly affect whether the machine in your clinic will deliver the protocol you’ve promised your clients, session after session.
For clinics evaluating suppliers, Konmison’s cavitation machine product line and publicly documented quality assurance standards (covering ISO 13485, CE, FDA, RoHS, FCC, and MSDS certifications) serve as a concrete reference point for what a properly certified equipment partner looks like. The protocol on paper is only as reliable as the machine executing it.
For clinic operators building or expanding a body contouring service, the treatment protocol and the equipment quality are two sides of the same decision. Konmison, for example, offers full OEM/ODM customization covering housing design, interface language, system programming, packaging, and certification documentation, backed by a dedicated after-sales engineering team. This gives clinic operators the flexibility to build a treatment offering that matches their specific client base rather than settling for a generic catalog listing.

06. Safety, Side Effects, and Who Should Avoid Cavitation
Cavitation has a strong safety profile when performed with properly certified equipment and within established protocols. But it is not for everyone, and knowing the boundaries is as important as knowing the protocol.
Common and Usually Temporary Side Effects
Most side effects are mild and resolve within 24 to 72 hours:
- Redness and warmth in the treated area — normal inflammatory response to acoustic energy
- Mild swelling or tenderness — the lymphatic system working through the released lipids
- Temporary thirst or mild headache — your body signaling hydration demand during lipid clearance
- Minor bruising — rare, typically from transducer pressure rather than the ultrasound itself
- Tingling or skin sensitivity — usually resolves within hours
These are not treatment failures. They are signs your body is responding and clearing. If swelling persists beyond 72 hours, your session frequency may be too aggressive.
Who Should NOT Undergo Cavitation
| Contraindication | Reason |
|---|---|
| Pregnancy or breastfeeding | No safety data exists for fetal/infant exposure to therapeutic ultrasound |
| Cardiac pacemaker or implanted electronic device | Ultrasound can cause electromagnetic interference with device circuitry |
| Active infection or open wound in treatment area | Acoustic energy can spread localized infection |
| Coagulation disorders or anticoagulant medication | Increased risk of subcutaneous bleeding and bruising |
| Severe liver or kidney disease | Impaired function risks metabolic overload from released lipids |
| History of malignancy in treatment area | Ultrasound effects on latent malignant cells are not well studied |
| Uncontrolled diabetes | Impaired wound healing and altered inflammatory response |
| Metal implants in treatment area | Ultrasound reflection at metal-tissue boundaries can cause localized heating |
- Pregnancy or breastfeeding — no safety data exists
- Cardiac pacemaker — ultrasound can interfere with circuitry
- Severe liver or kidney disease — risk of metabolic overload
Practical Precautions
If your BMI is above 30, manage expectations: cavitation is body contouring for localized fat, not a weight loss treatment. Results are most predictable for people within 5–10 kilograms of their goal weight.
If you’re menstruating, avoid abdominal treatment during the first 2–3 days of your cycle. Hormonal fluid retention already stresses the lymphatic system, and adding cavitation-induced lipid clearance can amplify bloating.
If you’ve had recent surgery in the treatment area, wait until full healing is complete (typically 8–12 weeks) before starting cavitation.
The information in this article is for educational purposes. Always consult a qualified aesthetic practitioner for personalized assessment before beginning any treatment course.
References
- PZLASER. “How Often Can You Do Cavitation? The Ultimate Guide to Safe & Effective Sessions.” July 2025. https://www.pzlaser.com/how-often-can-you-do-cavitation/
- WebMD. “What to Know About Ultrasonic Cavitation.” https://www.webmd.com/beauty/what-to-know-about-ultrasonic-cavitation
- CoLaz. “How Many Cavitation Sessions for Visible Inch Loss?” https://www.colaz.co.uk/blog/how-many-cavitation-sessions-for-inch-loss/
- Konmison. “Cavitation Machine Product Line.” https://www.konmison.com/cavitation-machine/
- Konmison. “Quality Assurance.” https://www.konmison.com/quality/
- Konmison. “OEM/ODM Customization.” https://www.konmison.com/oem-odm/
- Konmison. Homepage. https://www.konmison.com/